The Majolica Method for Hand-Painted Tiles
Posted by William Buyok on
In the second part of this series, Susan Mussi, author of Ceramic Dictionary, continues to offer her expertise on Majolica with a focus on technique in this edition.
If you missed her previous post, A Brief History of Hand-Painted Majolica Tile, read it first. If you find yourself in Barcelona, Spain make sure to visit her studio and shop, BenSu Ceramics.
Majolica, a Spanish term, is a lead and tin glaze that creates an opaque white surface that can be painted. The process consists of first firing the clay to become earthenware and then applying tin enamel that forms a white opaque porous surface. A design is then painted on to it with colors mixed with a transparent glaze.
It is always decorated onto bisque (fired clay). What makes Majolica different is that the glaze-base and the decoration are fired together to vitrify at 1796°F (980°C). This integrates the colors that overlap to form other colors, as well as shading. The white of the base is left as the lightest part and the movements of the brush strokes can be seen.
1) Applying the Glaze-Base onto Tiles.
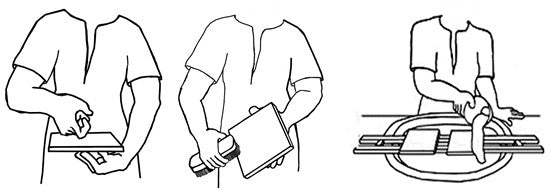
(above left) Sound the tiles to make sure they are not broken by placing the tile on top of your fingers on one hand (as shown), while tapping it with the knuckle of your other hand. If the sound is high, the tile is not broken; if the sound is low, do not use it.
(center) With a brush that has strong hair, clean the tiles on all sides.
(right) Cover the tiles with an opaque glaze-base by pouring it on. Put two thin, straight bars of wood across the container and lay a tile the right way up, on top. Fill up a small bowl with glaze, lift it up and tilt it over the left corner of the tile, move your hand across the part nearest to you while tilting the bowl so the glaze runs out and completely covers the tile.
2) Cleaning the Tiles.
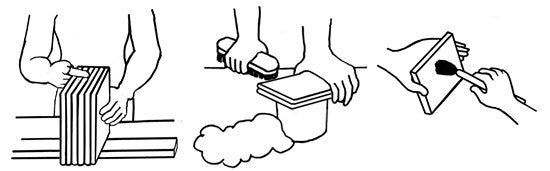
(above left) When the base is dry, place the tiles in pairs (lined up base to base) on top of a flat bar of wood that will hold two or three pairs vertically. On your index finger, wear a finger of a plastic glove and wipe off the glaze of the edges; turn it and clean all four sides.
(center) Place a pair of tiles on top of a tin and brush the glaze off the back of the tile. The cleaner you can get it, the better.
(right) Separate the tiles. With a soft brush, remove any loose glaze and repair any damaged parts.
3) Preparing the Glaze Colors.
Begin by mixing 1 part of color with 3 parts of transparent glaze (1:3). One part of color is all the color needed to form the one you require. Add water, stir, and pass it though a fine sieve into a jar to store it.
4) Preparing a Design.
First, draw the outlines of the image you would like on the tile. Scan it, and adjust it to make it to the size of the tile you are decorating. Now, print the outline and any other pertinent information (such as a room name, number or code) onto transparent paper.
Next, flip the transparent paper over and lay it on top of a thin piece of material. Pounce the outlines through the back using a pin pencil. The smaller and nearer the holes are, the better the outline will be marked.
5) Marking the Drawing Onto the Tile.
Put the prepared tile on a flat surface and place the pounced design the right way round, on top. Rub over the holes with a marking bag full of charcoal powder. Lift it up slowly making sure it is well marked.
6) Painting.
Put the tile onto a tile stand and prepare everything you need to paint with, on a table-trolley (colors, brushes, etc.)
Now, paint the outlines and the line round the tile parallel to the edge with a dark brown color using a cut down paintbrush. Once finished, carefully dust off the carbon powder with a clean, soft, dry brush.
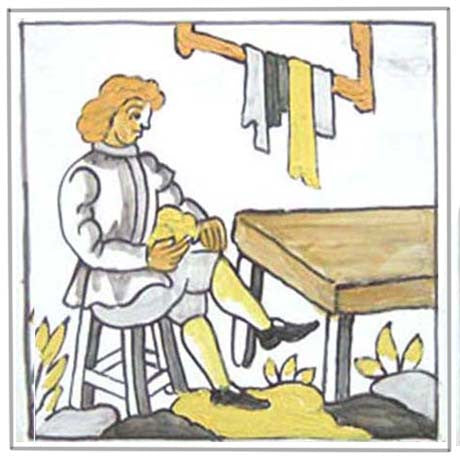
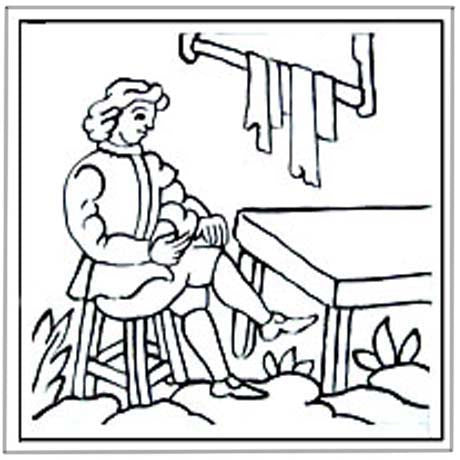
Next, paint the first colors starting with the lightest one. Make sure to leave parts of the white base as the lightest. Shading can be applied by putting the darker color underneath or on top of the main one. The jacket and legs of the table and chair are shaded and the color painted on top. All the others are painted the opposite way - painted then shaded.
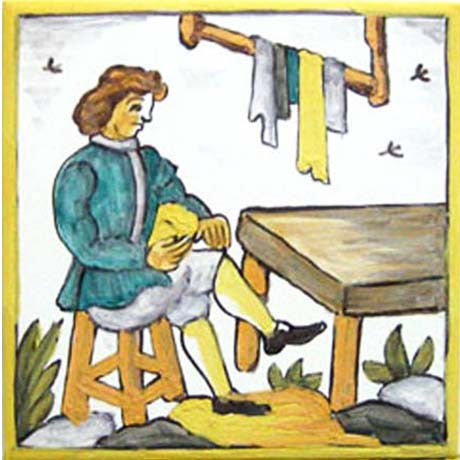
Then, add the darker colors, over-lapping the lighter ones to form others as well as shading. The last thing to do is to paint the yellow border around the edge. The green copper of the earth is just one color.
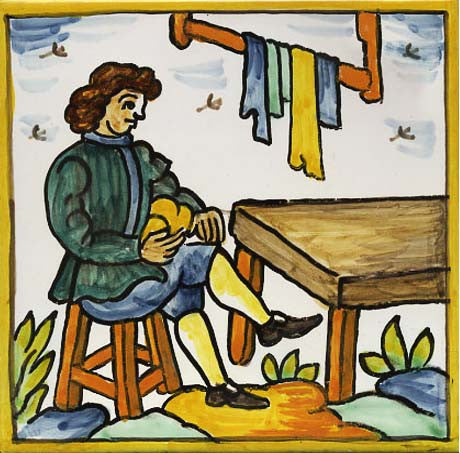
Lastly, the tile is fired at 1796°F (980°C). After firing, a bright, shiny glazed finish, which accentuates the colors and makes it absorbent to water, is achieved.
Share this post
- Tags: Decorative Methods For Painting Tile, Hand-glazed Tile, Hand-painted Ceramic Tile, Majolica Tiles, Spanish Tile